

Whether you are a seasoned waterproofing contractor, a civil engineer overseeing large infrastructure projects, or a homeowner looking to protect your building envelope from moisture damage, understanding the correct application method for acrylic rubber filled coating is absolutely critical. This advanced elastomeric coating system has revolutionized modern waterproofing and surface protection across residential, commercial, and industrial sectors worldwide.
Acrylic rubber filled coatings combine the superior film-forming properties of acrylic polymers with micro-rubber particles or elastomeric fillers, delivering exceptional crack-bridging capability, UV resistance, waterproofing performance, and long-term durability. When applied correctly, these coatings can extend the lifespan of a substrate by 10 to 20 years or more. But applied incorrectly? They fail prematurely — peeling, cracking, and allowing water ingress.
In this comprehensive guide, you will learn every step of the professional application process — from substrate assessment and surface preparation to final curing and inspection — packed with low-competition SEO keywords, expert tips, and globally applicable standards.
📌 Pro Insight: Studies from the global waterproofing industry indicate that over 80% of coating failures are caused by improper surface preparation — not poor material quality. Mastering prep is the #1 skill in acrylic rubber coating application.
What Is Acrylic Rubber Filled Coating?
Acrylic rubber filled coating — also known as elastomeric acrylic waterproofing membrane, rubber-modified acrylic coating, or flexible acrylic waterproof paint — is a water-based, polymer-modified protective coating specifically engineered to bridge hairline and structural cracks while providing a seamless, flexible waterproofing membrane.
The "rubber filled" designation refers to the incorporation of EPDM rubber granules, SBR (styrene-butadiene rubber) modifiers, or NBR (nitrile butadiene rubber) particles into the acrylic binder matrix. These additions dramatically increase the coating's elongation-at-break (often exceeding 300%), enabling it to expand and contract with substrate movement without cracking.
Key Technical Properties
| Property | Typical Value | Standard Reference |
|---|---|---|
| Elongation at Break | 250% – 450% | ASTM D2370 |
| Tensile Strength | 1.2 – 2.5 N/mm² | ASTM D638 |
| Water Absorption (24 hr) | < 5% | ASTM D570 |
| UV Resistance | Excellent (1000+ hrs QUV) | ASTM G154 |
| Dry Film Thickness (DFT) | 300 – 600 microns | SSPC-PA 2 |
| Crack Bridging (Dynamic) | Up to 2.0 mm | EN 1062-7 |
| Service Temperature | -30°C to +90°C | Manufacturer Spec |
These properties make acrylic rubber filled coating ideal for rooftop waterproofing, external wall cladding, basement tanking, bridge deck protection, podium deck waterproofing, swimming pool surrounds, and industrial floor coatings.

Fig 1. Professional application of elastomeric coating on a commercial exterior wall — achieving a seamless, crack-bridging membrane.
Tools and Materials Required for Application
Before beginning any acrylic rubber filled coating application, assembling the correct tools and materials is essential. Using substandard equipment leads to uneven film build, roller marks, poor adhesion, and wasted material.
Essential Application Tools
- Heavy-nap paint roller (18–20mm nap): For applying thick elastomeric coatings on textured or masonry surfaces
- Wide brush (100–150mm): For cutting-in edges, corners, and detail areas
- Airless spray machine (2500–3300 PSI): For large-area applications requiring high output and uniform film thickness
- Mixing paddle and variable-speed drill: For thorough homogenisation before and during application
- Wet film thickness gauge (WFT gauge): To monitor coat thickness in real-time
- Digital dry film thickness (DFT) meter: For post-application verification
- Digital thermo-hygrometer: To measure ambient temperature, substrate temperature, and relative humidity
Required Materials
- Acrylic rubber filled coating: Primary waterproofing membrane (select grade appropriate for the substrate)
- Acrylic bonding primer / penetrating primer: For enhancing adhesion on porous substrates
- Polyester reinforcement fabric (optional): 80–120 g/m² for crack-prone joints and transitions
- Cementitious crack filler / patching compound: For filling cracks >0.3mm prior to coating
- Masking tape and polyethylene sheeting: For protecting adjacent surfaces
- Personal protective equipment (PPE): Gloves, safety goggles, and dust mask for preparation works
Pre-Application Substrate Assessment
A thorough substrate assessment is the foundation of a successful acrylic rubber coating waterproofing job. This step determines the required level of surface preparation, the appropriate primer selection, and the total system design.
Assessment Checklist
- Visual inspection: Identify cracks (hairline vs. structural), delamination, spalling, blistering, efflorescence, biological growth (algae/moss), and areas of previous coating failure
- Moisture content test: Use a capacitance moisture meter. Substrate moisture should be <5% for cementitious surfaces before applying water-based acrylic coatings
- Adhesion pull-off test: Existing coatings must demonstrate a pull-off strength of ≥1.0 N/mm² (ASTM D4541) to be overcoated. Anything below requires mechanical removal
- Ambient conditions check: Temperature between 5°C and 35°C; relative humidity below 85%; no rain forecast within 24 hours; substrate temperature ≥3°C above dew point
In tropical climates (Southeast Asia, Middle East, sub-Saharan Africa), early-morning application (6–10 AM) avoids peak afternoon heat that accelerates surface drying and causes skinning before proper film formation. In cold climates (Northern Europe, Canada), use winter-grade acrylic formulations rated for low-temperature application.
Step-by-Step Surface Preparation Method
Surface preparation is the most labour-intensive yet most critical phase of the entire acrylic rubber filled waterproofing coating process. Every minute invested in proper preparation multiplies the service life of the coating system.
High-Pressure Water Jetting (HPWJ)
Remove all loose paint, dirt, dust, oil, biological contamination, and poorly adhering existing coatings using high-pressure water jetting at 1500–3000 PSI. For concrete substrates, minimum surface profile CSP 2–3 (ICRI 310.2) is required to ensure mechanical adhesion. Allow the substrate to dry completely — typically 24–48 hours in moderate climates.
Crack Repair and Joint Sealing
Rake out all cracks wider than 0.3 mm to a V-shaped profile (minimum 5 mm depth) using a grinder or crack chaser. Fill with a suitable polymer-modified cementitious repair mortar or a polyurethane sealant for dynamic cracks. Allow full cure per manufacturer specification — typically 24–72 hours. For expansion joints and movement joints, install flexible polyurethane or polysulphide sealant backed with closed-cell foam backer rod.
Efflorescence and Contamination Removal
Treat efflorescence (white salt deposits) by dry wire brushing followed by washing with a 10–15% diluted acid solution (muriatic acid / hydrochloric acid) on masonry. Neutralise with a sodium bicarbonate solution, rinse thoroughly, and allow to dry. Remove oil and grease contamination with a degreasing agent. Biological growth (algae, moss, mildew) should be killed using a biocide wash — this step is critical in humid tropical regions to prevent coating failure under biological films.
Surface Profiling and Final Clean
Lightly abrade smooth concrete or glazed surfaces by mechanical sanding or grit blasting to achieve adequate surface roughness (minimum Ra 25–50 microns). Remove all dust using clean compressed air or a dry brush. Conduct a final surface inspection and moisture check before proceeding to primer application. The surface should be clean, dry, sound, and free from all contaminants.


Fig 2 & 3. Left: Mechanical surface cleaning; Right: Crack repair and substrate preparation before primer application.
Primer Application — The Critical Adhesion Layer
Priming is a non-negotiable step in the professional application of acrylic rubber filled coatings, particularly on highly porous substrates such as aerated concrete blocks (AAC), old cement render, porous brick, and previously painted surfaces.
Primer Selection Guide
| Substrate Type | Recommended Primer | Dilution Ratio | Coverage |
|---|---|---|---|
| Highly porous concrete / masonry | Acrylic penetrating primer | 1:1 with water | 8–12 m²/litre |
| Smooth concrete / cement render | Bonding acrylic primer | Undiluted | 6–10 m²/litre |
| Metal substrates (galvanised) | Epoxy tie-coat / etch primer | Per spec | Per spec |
| Previously painted (sound) | Acrylic multi-surface primer | Undiluted | 10–14 m²/litre |
| Fibrous cement / fibre board | Sealer/primer coat (1:1) | 1 part water | 8–11 m²/litre |
Apply the primer using a brush or short-nap roller, ensuring complete coverage without skips or holidays. On highly porous substrates, two coats of diluted primer may be required. Allow the primer to cure to a tack-free state before applying the first coat of the acrylic rubber filled coating — typically 1–4 hours at 25°C, 50% RH.
Mixing the Acrylic Rubber Filled Coating
Proper mixing is one of the most overlooked yet most important steps in the acrylic rubber coating application method. Inadequate mixing leads to uneven rubber particle distribution, colour inconsistency, poor film formation, and premature coating failure.
Mixing Procedure
- Condition the material: Allow the coating to acclimatise to application temperature (15–30°C) for a minimum of 2 hours if stored in cold conditions
- Open and inspect: Check for any skinning or separation. Remove any dried skin carefully — never mix it back into the coating
- Power mix: Using a variable-speed drill (300–500 RPM) and jiffy/paddle mixer, mix the coating for a minimum of 3 full minutes. Scrape sides and bottom of the drum regularly
- Check consistency: After mixing, the coating should be smooth, homogeneous, and free of lumps. Run the mixture through a 1.5 mm strainer if using airless spray equipment
- Limit dilution: Acrylic rubber filled coatings are typically supplied at application viscosity. If thinning is required, add a maximum of 5% clean, potable water. Never exceed manufacturer-specified dilution limits
⚠️ Critical Warning: Do NOT add solvents, thinners, or ammonia to acrylic rubber filled coatings. These will break down the rubber particle dispersion, cause film defects, and void the warranty. Only use clean water if dilution is necessary.
Application Method — Step-by-Step Coat System
The following application method applies to a standard three-coat acrylic rubber filled waterproofing system suitable for rooftops, external walls, concrete structures, and industrial floors. Adjust the system specification based on the manufacturer's Product Data Sheet (PDS) for your specific product and project requirements.

Fig 4. Three-coat acrylic rubber elastomeric waterproofing system being applied on a commercial flat roof.
Coat 1 — Base Coat (Primer Coat or First Full Coat)
Apply the first coat of acrylic rubber filled coating at a wet film thickness of 250–350 microns using a heavy 18–20 mm nap roller or airless spray equipment. Work in manageable sections (2–5 m²) and maintain a wet edge to avoid lap marks. Ensure complete, even coverage with no skips, pinholes, or roller holidays. Apply in a cross-hatch pattern (vertical strokes followed by horizontal strokes) to ensure uniform film build.
Wet film thickness target: 300 microns WFT → approximately 150 microns DFT (assuming 50% volume solids).
Allow the base coat to cure until touch-dry — typically 2–4 hours at 25°C, 50% RH. In humid tropical conditions, extend this to 4–6 hours. Do NOT proceed to the next coat if the surface is still tacky or if it deflects under thumb pressure.
Coat 2 — Reinforcement Layer (With Fabric Embed — Optional but Recommended)
For areas with active cracking, movement joints, pipe penetrations, drains, corners, and transitions between different substrate materials, apply a reinforcement fabric layer between the first and second coats.
Procedure: While the first coat is still wet (within 30–60 minutes of application), embed a 100–200 mm wide strip of open-weave polyester reinforcement fabric into the wet coating using a wide brush. Smooth out all wrinkles and ensure the fabric is fully saturated with coating material. Apply a brush coat of acrylic rubber coating over the fabric immediately to seal it. Allow this to cure completely before applying the full second coat.
Coat 3 — Full Second Coat (Intermediate Build Coat)
Apply the second full coat at 250–350 microns WFT in a direction perpendicular to the first coat — if the first coat was rolled horizontally, roll the second coat vertically. This cross-coat application method eliminates pinholes and holidays, ensuring a fully sealed, continuous waterproofing membrane.
At this stage, the cumulative DFT should be approaching 300–400 microns. Verify using a non-destructive wet film thickness gauge or a digital DFT meter on cured sections.
Coat 4 — Final Top Coat (Finish / UV Protective Coat)
The final coat serves as the UV-protective and wear-resistant layer. For rooftop applications in high-solar-radiation regions (Australia, Middle East, South Asia, Mediterranean), select a heat-reflective white or light grey top coat with a Solar Reflectance Index (SRI) of 85 or higher. This significantly reduces roof surface temperature and thermal loading, improving energy efficiency.
Apply at 200–300 microns WFT. Total final DFT of the system (excluding primer) should be 450–600 microns minimum for general waterproofing duty, and 600–800 microns for high-exposure or trafficked rooftop applications.
Application by Method Type
Roller Application
- Use an 18–20 mm lambswool or heavy synthetic nap roller for maximum pick-up and release on textured masonry
- Load roller fully by running it through the tray; avoid overloading which causes splashing
- Apply with moderate, consistent pressure in a "W" or "M" pattern for even distribution
- Work in 1–2 m² sections, maintaining a wet edge for seamless lap blending
Airless Spray Application
- Recommended for large flat areas: rooftops >200 m², external facade areas, bridge decks, parking structures
- Airless spray settings: 2500–3300 PSI working pressure; 0.021"–0.027" reversible tip; 30–40 cm spray distance
- Maintain 50% overlap on each pass to ensure uniform coverage and eliminate striping
- Mask all windows, fixtures, adjacent surfaces before spraying — overspray travels significant distances in wind
- Use a back-roller technique (spray then immediately roll) to improve penetration on rough textures
Brush Application
- Recommended only for detail areas, corners, pipe penetrations, parapet walls, step flashing, and complex geometries
- Use a 100–150 mm wide bristle brush (synthetic bristles preferred) for even application
- Apply with consistent brush strokes; avoid scrubbing which can create air bubbles in the wet film


Fig 5 & 6. Left: Airless spray method for large commercial façades; Right: Heavy-nap roller for flat roof acrylic rubber coating application.
Critical Application Conditions and Restrictions
Understanding the application conditions that govern successful acrylic rubber filled coating installation is what separates professional waterproofing contractors from amateurs. These environmental and substrate conditions must be monitored continuously throughout the application process.
| Parameter | Minimum | Optimal | Maximum |
|---|---|---|---|
| Ambient Temperature | 5°C (41°F) | 15–25°C | 35°C (95°F) |
| Relative Humidity | 20% | 40–65% | 85% |
| Substrate Temp (above dew point) | +3°C | +5°C | +10°C |
| Wind Speed (spray application) | 0 m/s | <3 m/s | 5 m/s |
| Time to Rain after Application | 4 hours | 8+ hours | N/A |
Common Application Mistakes to Avoid
- Applying over wet or damp substrates: Even slightly damp concrete significantly reduces adhesion — always moisture-test before priming
- Under-diluting or over-diluting: Too thick causes poor penetration and surface rippling; too thin reduces DFT and waterproofing performance
- Applying in direct sunlight on very hot surfaces: Surface temperatures above 50°C cause flash-drying before the film properly coalescences — apply in shade or during cooler periods
- Inadequate inter-coat drying time: Applying subsequent coats over still-wet underlying coats traps moisture, causes solvent blistering, and leads to delamination
- Neglecting detail areas: Pipe penetrations, drains, expansion joints, and corners are the most common sources of waterproofing failure — always reinforce these first
Post-Application Curing and Inspection
Curing Times
Acrylic rubber filled coatings cure through water evaporation and polymer coalescence — not chemical crosslinking. This means curing is temperature and humidity dependent. Below are typical curing guidelines under standard conditions (25°C, 50% RH):
- Touch dry (first coat): 1–2 hours
- Recoat time (between coats): 3–6 hours
- Light foot traffic: 24 hours after final coat
- Full service waterproofing (immersion ready): 7–14 days
- Full mechanical properties: 28 days
🌦️ Weather Protection: Protect freshly applied acrylic rubber coatings from rain, dew, and heavy condensation for a minimum of 4–6 hours after each coat. Early water contact before film formation causes washout, white discolouration (blush), and severe reduction in waterproofing integrity.
Post-Application Quality Inspection
- Visual inspection: Check for pinholes, skips, thin areas, sags, runs, blistering, or fish-eye defects across the entire coated area
- DFT measurement: Use a calibrated digital DFT meter. Take readings at minimum 5 points per 10 m² to ensure adequate film build throughout
- Flood test / ponding test (for rooftops): Pond water to 25–50 mm depth for 24–48 hours and inspect for any water seepage. This is the definitive waterproofing acceptance test
- Holiday (spark) test (for critical waterproofing): Use a low-voltage wet sponge holiday detector to identify pinholes in fully cured membranes
- Adhesion pull-off test: ASTM D4541 — minimum 1.5 N/mm² adhesion strength required for the completed system
Applications and Use Cases Worldwide
Acrylic rubber filled coatings are among the most versatile waterproofing and protective systems available globally. Their ease of application, water-based formulation (low VOC, environmentally friendly), crack-bridging performance, and long service life make them the coating of choice across a wide range of applications in every climate zone.
Top Global Applications
Residential Flat Roof Waterproofing
Popular across the UK, Australia, Middle East, and South Asia. Acrylic rubber coatings provide seamless protection on concrete, fibre cement, and sheet metal roofs with minimal disruption to occupants. Reflective white top coats reduce cooling costs by up to 25% in hot climates.
Commercial and Industrial Façade Coatings
Applied to external cladding, curtain wall panels, and precast concrete facades in high-rise developments across Southeast Asia, Europe, and North America. Provides a weather-resistant, decorative, and self-cleaning finish.
Bridge Deck and Infrastructure Protection
Used extensively for protecting reinforced concrete bridge decks from chloride ingress, carbonation, and freeze-thaw damage. Approved under specifications from transport authorities in Australia, the UAE, UK, and the United States.
Swimming Pool Surrounds and Wet Areas
Specially formulated acrylic rubber coatings rated for continuous wet immersion are used in pool decks, wet rooms, and balcony waterproofing — providing a slip-resistant, durable, and hygienic finish.
Frequently Asked Questions (FAQ)
Maintenance and Recoating Guide
A well-maintained acrylic rubber filled waterproofing system provides decades of reliable protection with minimal lifecycle cost. Implement the following maintenance programme to maximise return on investment:
- Annual inspection: Inspect all coated areas for signs of cracking, delamination, chalking, biological growth, or sealant failure at transitions. Clean drains and outlets
- Biannual cleaning: Wash coated surfaces with a mild detergent solution to remove dirt, pollution deposits, and biological growth. High-pressure washing (800–1200 PSI) is effective for heavy soiling
- Maintenance recoat (5–8 years): Apply one to two fresh coats of compatible acrylic rubber coating over the cleaned and lightly abraded existing membrane to restore waterproofing performance and UV protection
- Crack and joint re-sealing: Any new cracks or joint movements should be addressed promptly with appropriate sealant before water penetration begins


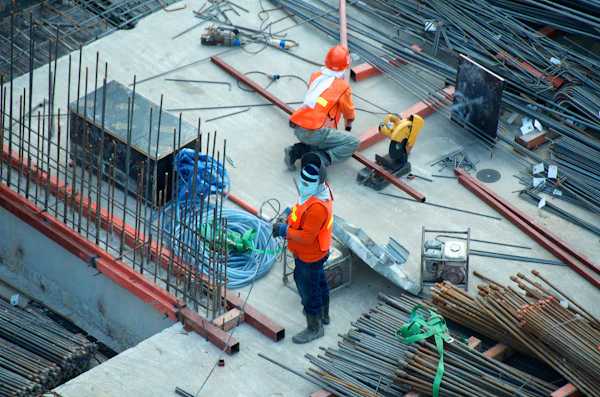


Gallery: Real-world applications of elastomeric and acrylic rubber waterproofing systems across residential, commercial, and infrastructure projects globally. (All images: Royalty-free from Unsplash)
Related Keywords and Topics
🏗️ Protect Your Structure Today
Master the professional application of acrylic rubber filled coatings and ensure your waterproofing system delivers decades of reliable performance. Bookmark this guide, share it with your team, and explore more expert resources on ramsprozone.blogspot.com.
Explore More Guides →This guide is provided for general informational purposes. Always refer to the specific Product Data Sheet (PDS) and Technical Data Sheet (TDS) of the coating manufacturer for your chosen product. Site conditions, substrate types, and project specifications vary — engage a qualified waterproofing specialist for critical applications.


0 Comments